Caring For Your Hob – Maintenance Tips for Long Lasting Performance

Want to know the best way to care for your hob? We’ve put together a helpful guide to point you in the right direction. If you’re looking at how to achieve the ultimate in gas hob maintenance, you’re in the right place. When all’s said and done it’s a combination of everyday surface cleaning, coupled with a scheduled deep cleaning plan.
Whether you’re looking at the best gas hob maintenance advice, or perhaps you’re dealing with electric or induction hobs, we’ve got all the hob cleaning pointers to get you started.
Gas Hob Maintenance Guidance
Following some considerable research we’ve identified some tried and tested hob cleaning methods. These helpful tips are sure to leave your hob sparkling like new and operating at peak efficiency. When your hob is at top performance level, and gleaming gloriously, even the most laborious of cooking tasks will be more of a pleasure, less of a chore.
Remember, it’s a combination of regular and scheduled deep cleaning that will keep your hob in tip top condition. Always wipe the hob after cooking, to remove spillages and food debris. That way, when it comes to the deeper clean, you won’t have too much to deal with.
Who is this guide for?
In short, anyone who uses a gas hob will find this useful. Whether you’re using it for everyday cooking or special occasions, you can benefit from this comprehensive hob cleaning guide. Follow the steps below to ensure safety, hygiene and longevity of your appliance.
When the time comes for the deep clean, follow these steps for a fantastic finish….
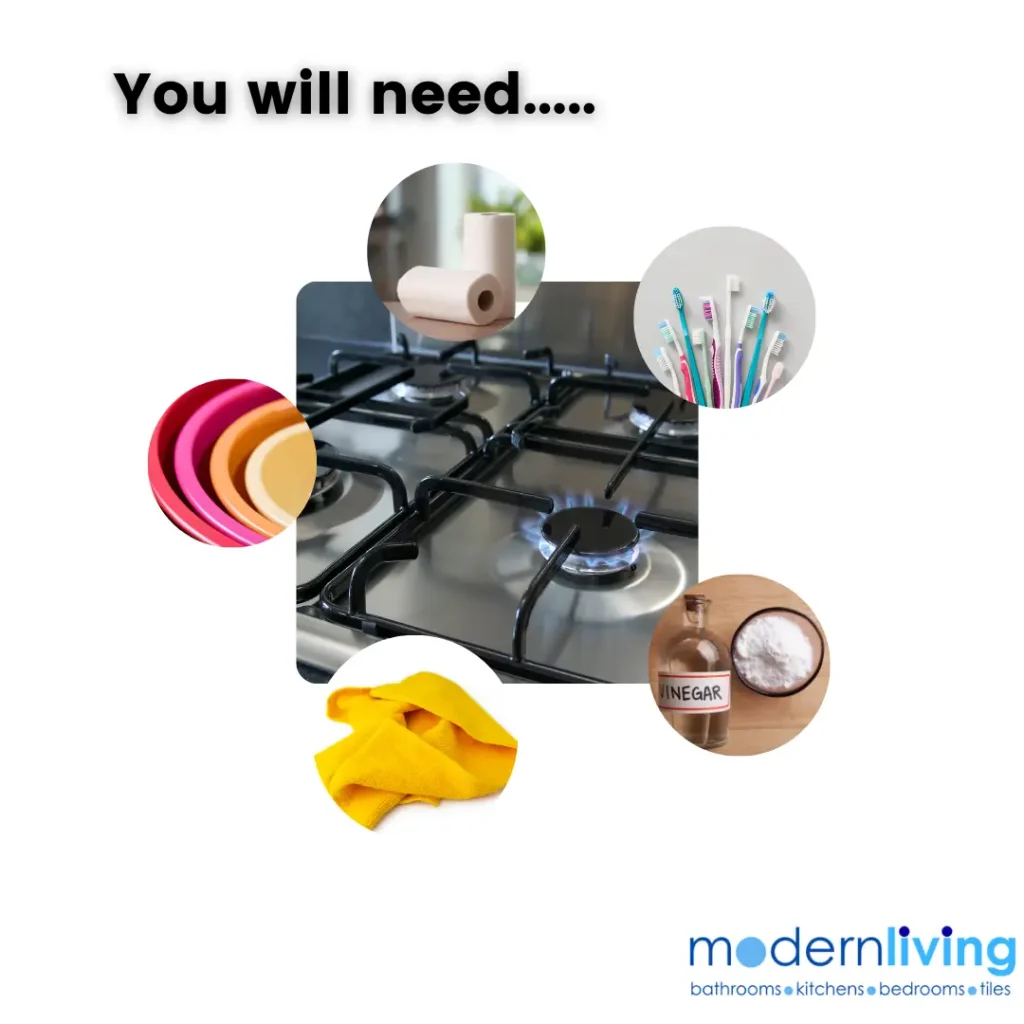
What you’ll need
- Dish soap
- Baking soda
- White vinegar
- Soft cloths and sponges
- Toothbrush
- Bowl
- Paper towels / kitchen roll
Easy steps for effective gas hob maintenance:
Turn off the gas hob
Before you begin any work, make sure the gas supply is turned off. This is vital, for safety purposes.
Allow hob to cool
Wait at least 30 minutes after cooking, before you begin the cleaning process. The hob needs to be completely cool before you start dismantling it. Avoid burning yourself by adhering to this simple step.
Remove grates and burner caps
Carefully remove the grates and burner caps from your hob. If your hob also has removable knobs, take them off too.This means you’ll be able to get into all the difficult to reach places, with ease. These parts are particularly susceptible to gathering grease and grime. You’ll really see the difference when you come to replace them.
Soak SOME of the removable parts
You might be wondering why only ‘some’ of the parts. The fact is, when you are cleaning gas hob burners, soaking them could result in them having performance issues when replaced. You can, however, soak the grates and knobs.
First, fill your bowl with warm, soapy water. Place the parts into the water and leave to soak for around 15-20 minutes. This should be ample time to loosen any stubborn food and grease particles.
Top Tip: Add some baking soda to the water for an additional cleaning boost.
Start cleaning the hob
While you’re waiting for the removable parts to soak, you can use this time to begin cleaning the surface of the hob. Remember to take care when cleaning the hob surface. This area is often fabricated from materials that are easily damaged. To minimise the risk of scratches to the hob surface, use soft cloths and sponges. Avoid wire wool and other abrasive materials.
Wipe the surface with your cloth to remove dirt and grime. For any stubborn residue we recommend using a mix of baking soda and white vinegar. Simply sprinkle the affected area with baking soda, before spraying white vinegar onto it. The mixture will fizz a little. Leave it for a few minutes before gently scrubbing with your non-abrasive cloth or sponge.
Cleaning gas hob burners
It’s best to use a soft cleaning brush or toothbrush for this stage. It will gently remove any burnt-on residue, without causing damage to the surface of the burner heads.
Rinse and dry removable parts
Before drying make sure to rinse all parts under warm, running water. Then take care to carefully dry all the parts you have cleaned. Paper towels or standard kitchen roll is best for this. Doing this helps to prevent water spots and rust from forming.
Reassemble the hob
Place the burner caps, grates and knobs back in their correct position. Ensure everything is properly fitted before cooking.
Final wipe down
A quick wipe down, with a soft, dry cloth will finish the job, leaving you with a gas hob to be proud of.
Remember, this is only part of your gas hob maintenance. Regular cleaning, after cooking, is the best way to maintain the cleanliness of your hob in between deep cleans. A little regular care can go a long way to keeping your cooking space fresh and functional.
As a quick recap, here are a few things to do, or avoid, when it comes to effective gas hob maintenance.
Do’s and Don’ts
DO
- Turn off the gas
- Use mild cleaning products
- Rinse thoroughly
- Wait for elements to dry before re-assembly
DON’T
- Don’t clean until the hob has cooled down
- Don’t soak the burner heads
- Don’t use harsh chemicals
- Don’t use abrasive cleaning tools
We hope you find this guide useful and easy to follow. It’s always a good idea to consult your user manual prior to embarking on a deep clean of your gas hob. Some manufacturers will have advice specific to the model you have, and this is by far the best approach to take before you start.
Regular cleaning will not only enhance the appearance of your cooking surface, it will also be a safe place to prepare food.